
Rescue mode boots a separate recovery environment so you can inspect the original system disk and recover files when the normal OS cannot boot. It is different from reinstalling: recovery should preserve the original disk rather than format it.
Plan downtime before enabling rescue mode. The normal applications are interrupted while the VPS boots the recovery environment. A failing or corrupted disk may require specialist help. Reviewed: 15 November 2026. The screenshot shows the actual rescue setup form with identifying details hidden.
When to use it
Typical situations include a failed boot after configuration changes, an inaccessible SSH service, a damaged network setup or the need to copy files before rebuilding. If the OS still boots, try the VNC (console) first: console access can help diagnose a network lockout without changing the boot environment. Rescue mode is not a guarantee that damaged data can be recovered, and it does not replace an independent backup.
1. Open the correct service
In the customer portal, use Services → Manage service, verify the Service ID, hostname and IP, read the acknowledgement and open the full VPS control panel. In the separate tab, check the selected server again. Choose Rescue Mode.
Select a screenshot to open it at full size.
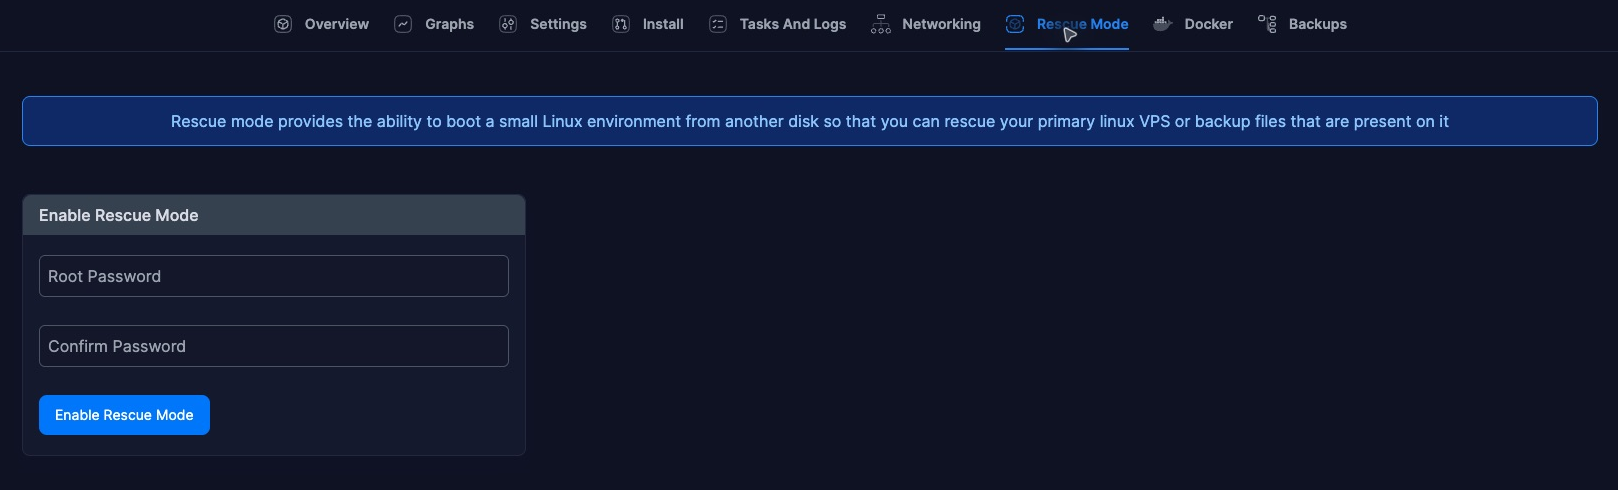
The inspected form explains the separate Linux recovery environment and asks for Root Password and Confirm Password. These credentials belong to the temporary rescue system, not your billing login or necessarily the installed OS.
2. Enable rescue only when ready
Save work and arrange the interruption. Create a unique temporary password in a password manager, enter it twice and choose Enable Rescue Mode. Read the panel's notices and follow the task status. Allow the boot transition to finish; do not repeatedly click or force power actions because SSH has not immediately returned.
Connect using the rescue details supplied by the panel, or its console if available. A different boot environment may have a different SSH host key. Verify that identity through a trusted console or support before changing your trusted-host entry. Do not bypass a host-key warning without establishing why it changed.
3. Identify the original disk before mounting
Inside the recovery environment, begin with read-only inspection:
lsblk -o NAME,SIZE,FSTYPE,LABEL,MOUNTPOINTS
blkid
Identify the original disk from its size, layout and filesystem. Never assume that it is /dev/vda1: the rescue environment can attach devices in a different order. LVM, encrypted disks, RAID and unusual filesystems need their own procedure and recovery keys. Check whether a filesystem is already mounted before attempting anything else.
For a healthy, unmounted ext4 data partition, a cautious file-copy starting point is a read-only mount that avoids journal replay. Replace /dev/REPLACE_WITH_ORIGINAL_PARTITION only after identification:
mkdir -p /mnt/original
mount -t ext4 -o ro,noload /dev/REPLACE_WITH_ORIGINAL_PARTITION /mnt/original
ls -la /mnt/original
This example is not for XFS, encrypted containers, LVM volumes that are not activated, or an unknown filesystem. If mounting fails, stop and record the error instead of trying formatting, repair or forced options. Do not run mkfs, wipefs, partition deletion or an automatic repair on the only copy of important data.
4. Copy files outside the VPS
Use SFTP or another authenticated transfer method to copy required data from the mounted filesystem to independent storage. Verify the destination copy. Database files copied from a crashed OS may require application-specific recovery; their presence alone does not prove consistency. Keep passwords and private keys out of support tickets.
Repairs to boot or network configuration require a plan appropriate to the actual OS. Recover the data first. If unsure, request support with the billing Service ID, failure time and nonsecret error text.
5. Return to normal boot
Finish transfers, leave mounted directories and unmount only what you mounted when it is safe to do so. Use Disable Rescue Mode when the panel reports rescue is enabled, then follow its instructions for returning to the normal system. This transition interrupts the recovery session. Verify boot, SSH, network and application health; disabling rescue does not itself repair the original fault.
Do not use Install → Reinstall as a way to leave rescue mode: reinstalling can erase the files you are trying to recover. Remove temporary rescue credentials from your local tools and sign out of the panel after completion.